Henna Tattoos: A Comprehensive Guide on How to Create Stunning Temporary Art
Henna tattoos, also known as mehndi, have been a cherished form of body art for centuries, particularly in South Asia, the Middle East, and Africa. This intricate art form uses a paste made from the henna plant to create temporary designs on the skin. Whether you’re drawn to its cultural significance or simply appreciate its aesthetic appeal, learning how to create your own henna tattoos can be a rewarding experience. This comprehensive guide will walk you through every step, from preparing the henna paste to applying the design and caring for your tattoo to ensure a rich, long-lasting stain.
Understanding Henna: The Basics
Before diving into the application process, it’s crucial to understand what henna is and how it works. Natural henna is derived from the *Lawsonia inermis* plant. The leaves are dried, crushed into a fine powder, and then mixed with liquids to create a paste. This paste stains the skin a reddish-brown color.
The Importance of Natural Henna
It’s vital to use only natural henna for your tattoos. “Black henna,” which contains a chemical dye called paraphenylenediamine (PPD), can cause severe allergic reactions, permanent scarring, and skin damage. Always ensure that the henna you are using is 100% natural and free from additives. Natural henna paste typically has a greenish-brown color and a pleasant, earthy smell.
Gathering Your Supplies
To create your own henna tattoos, you’ll need the following supplies:
- Henna Powder: Purchase high-quality, finely sifted henna powder.
- Liquid: Lemon juice, strong brewed tea, or distilled water are commonly used. Lemon juice helps release the dye in the henna.
- Essential Oils: Tea tree, lavender, or eucalyptus oil enhance the staining process and provide a pleasant aroma. These oils contain monoterpenes, which aid in the dye release.
- Sugar: A small amount of sugar adds pliability to the paste, making it easier to apply.
- Applicator: Choose between a cone, a syringe, or a bottle with a fine tip. Cones are the most traditional and allow for precise application.
- Sealant: A mixture of lemon juice and sugar can be used to seal the henna design, keeping it moist and in contact with the skin for longer.
- Gloves: To protect your hands from staining.
- Paper Towels: For easy cleanup.
- Design Stencils (Optional): If you’re not confident in your freehand drawing skills, stencils can be a great help.
Preparing the Henna Paste
The key to a successful henna tattoo lies in the preparation of the henna paste. Follow these steps carefully:
- Sifting the Henna Powder: Sift the henna powder through a fine sieve to remove any clumps and ensure a smooth paste.
- Mixing the Ingredients: In a glass or stainless steel bowl (avoid using plastic), combine the sifted henna powder with the liquid of your choice (lemon juice, tea, or water) gradually. Add the essential oil and sugar. Mix until you achieve a consistency similar to yogurt or toothpaste.
- Cover and Rest: Cover the bowl tightly with plastic wrap and let it sit at room temperature for 12-24 hours. This allows the dye to release from the henna powder, a process known as “dye release.”
- Check the Consistency: After the resting period, check the consistency of the paste. It should be smooth and easily flowable. If it’s too thick, add a little more liquid. If it’s too thin, add a bit more henna powder.
- Transfer to Applicator: Transfer the henna paste into your chosen applicator (cone, syringe, or bottle). If using a cone, seal the end tightly with tape to prevent leakage.
Preparing the Skin
Proper skin preparation is essential for achieving a dark and long-lasting henna tattoo. Follow these steps:
- Clean the Skin: Wash the area where you plan to apply the henna with soap and water. Avoid using lotions or oils, as they can create a barrier between the henna and your skin.
- Exfoliate (Optional): Gently exfoliating the skin can help remove dead skin cells, allowing the henna to penetrate deeper.
- Avoid Shaving or Waxing: Refrain from shaving or waxing the area for at least 24 hours before applying henna, as this can make the skin more sensitive.
Applying the Henna Design
Now comes the fun part – applying the henna tattoo! Here’s how to do it:
- Practice: If you’re new to henna application, practice your design on paper first to get a feel for the applicator and the flow of the paste.
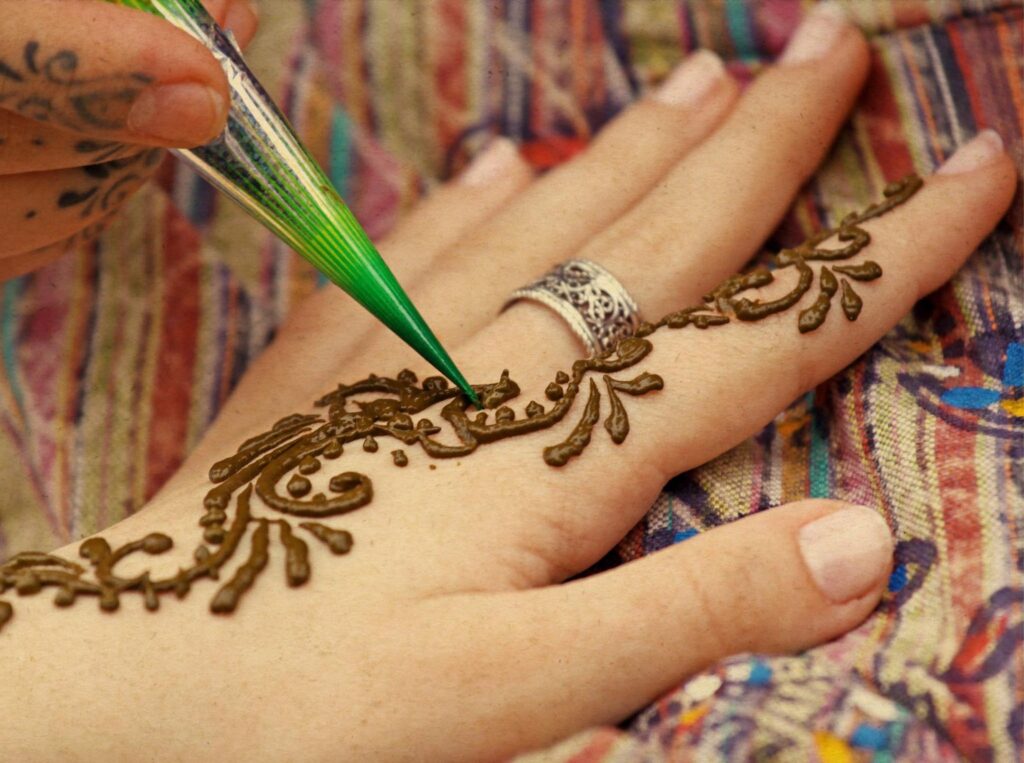
- Apply the Design: Hold the applicator like a pen and gently squeeze out the henna paste, following your chosen design. Apply a consistent layer of paste, ensuring that it makes good contact with the skin. If using a stencil, carefully apply the henna over the stencil, then remove the stencil.
- Correct Mistakes: If you make a mistake, quickly wipe away the henna paste with a damp cotton swab.
- Apply Sealant: Once the design is complete, apply a sealant (lemon juice and sugar mixture) to keep the henna paste moist and in contact with the skin for longer. This helps achieve a darker stain.
Caring for Your Henna Tattoo
Proper aftercare is crucial for a rich, long-lasting henna tattoo. Follow these tips:
- Keep it Moist: Apply the lemon juice and sugar sealant every 15-20 minutes for the first hour. This helps keep the henna paste moist and enhances the staining process.
- Wrap the Area (Optional): Wrapping the area with medical tape or a cloth can help keep the henna paste in place and protect it from rubbing off.
- Avoid Water: Keep the henna paste dry for as long as possible. Avoid washing the area for at least 2-6 hours. When you do wash it, gently pat it dry instead of rubbing.
- Avoid Soap and Chemicals: Avoid using soap, lotions, or other chemicals on the area for the first 24 hours.
- Keep it Warm: Warmth helps the henna stain develop. You can use a hairdryer on a low setting to gently warm the area.
- Let it Fall Off Naturally: Allow the henna paste to dry and fall off naturally. Do not scrape it off, as this can disrupt the staining process.
- Moisturize: After the henna paste has fallen off, moisturize the area with a natural oil, such as coconut oil or olive oil. This helps keep the skin hydrated and enhances the color of the stain.
Troubleshooting Henna Tattoos
Sometimes, despite your best efforts, things might not go as planned. Here are some common issues and how to address them:
- Light Stain: A light stain can be due to several factors, including poor henna quality, insufficient dye release, inadequate skin preparation, or improper aftercare. Ensure you are using high-quality henna, allowing sufficient dye release time, preparing your skin properly, and following the aftercare instructions diligently.
- Uneven Stain: An uneven stain can be caused by inconsistent application of the henna paste or uneven skin texture. Practice applying the henna paste evenly and exfoliate your skin before application.
- Allergic Reaction: If you experience itching, redness, or swelling, discontinue use immediately and consult a doctor. This could be a sign of an allergic reaction to an ingredient in the henna paste, particularly if “black henna” was used.
Henna Tattoo Designs and Inspiration
The possibilities for henna tattoo designs are endless. Here are some ideas to get you started:
- Floral Patterns: Floral designs are a classic choice, featuring intricate flowers, leaves, and vines.
- Geometric Shapes: Geometric patterns offer a modern and stylish look, incorporating lines, circles, and triangles.
- Paisley Designs: Paisley patterns are traditional and elegant, often used in Indian and Middle Eastern mehndi designs.
- Tribal Motifs: Tribal designs draw inspiration from various cultures around the world, featuring bold lines and symbolic elements.
- Personalized Symbols: Incorporate symbols that hold personal meaning, such as initials, dates, or meaningful images.
You can find inspiration for henna tattoo designs online, in books, or by looking at traditional mehndi patterns. Don’t be afraid to experiment and create your own unique designs.
The Cultural Significance of Henna
Henna tattoos are more than just a form of body art; they hold deep cultural and historical significance. In many cultures, henna is used in celebrations and ceremonies, particularly weddings. It is believed to bring good luck, prosperity, and protection to the wearer.
In South Asian weddings, the bride’s hands and feet are adorned with intricate henna designs, symbolizing the bond between the couple and their families. The application of henna is often a festive occasion, with music, dancing, and laughter filling the air.
Respecting the cultural significance of henna is essential when creating and wearing henna tattoos. Avoid appropriating designs from cultures that are not your own, and be mindful of the traditions and beliefs associated with henna.
Conclusion
Creating your own henna tattoos is a rewarding and creative endeavor. By following these steps and taking the time to learn about the art and culture of henna, you can create stunning temporary designs that celebrate beauty, tradition, and self-expression. Remember to always use natural henna, prepare your skin properly, and care for your tattoo to ensure a rich, long-lasting stain. Happy henna-ing!
[See also: Temporary Tattoo Guide]
[See also: Safe Henna Practices]
[See also: DIY Body Art Ideas]
